前言 前面几篇我们把大模型接进了前端:聊天、流式输出、RAG 知识库,一路走来模型越来越”博学”。但用着用着你会发现,它始终停留在”动嘴”层面——用户说”帮我把页面切成深色模式”,模型只能回复”您可以点击右上角的设置按钮……”。它不能做事,因为它没有手。这篇要讲的 Function Calling(函数调用)就是给模型装上手的过程:模型负责理解意图、决定调什么工具、给出参数,而执行权始终在我们前端代码手里 。这是从聊天机器人迈向 AI 应用、乃至 Agent 的关键一步。
1. 从”会说话”到”会做事” 回顾一下我们已有的能力边界:
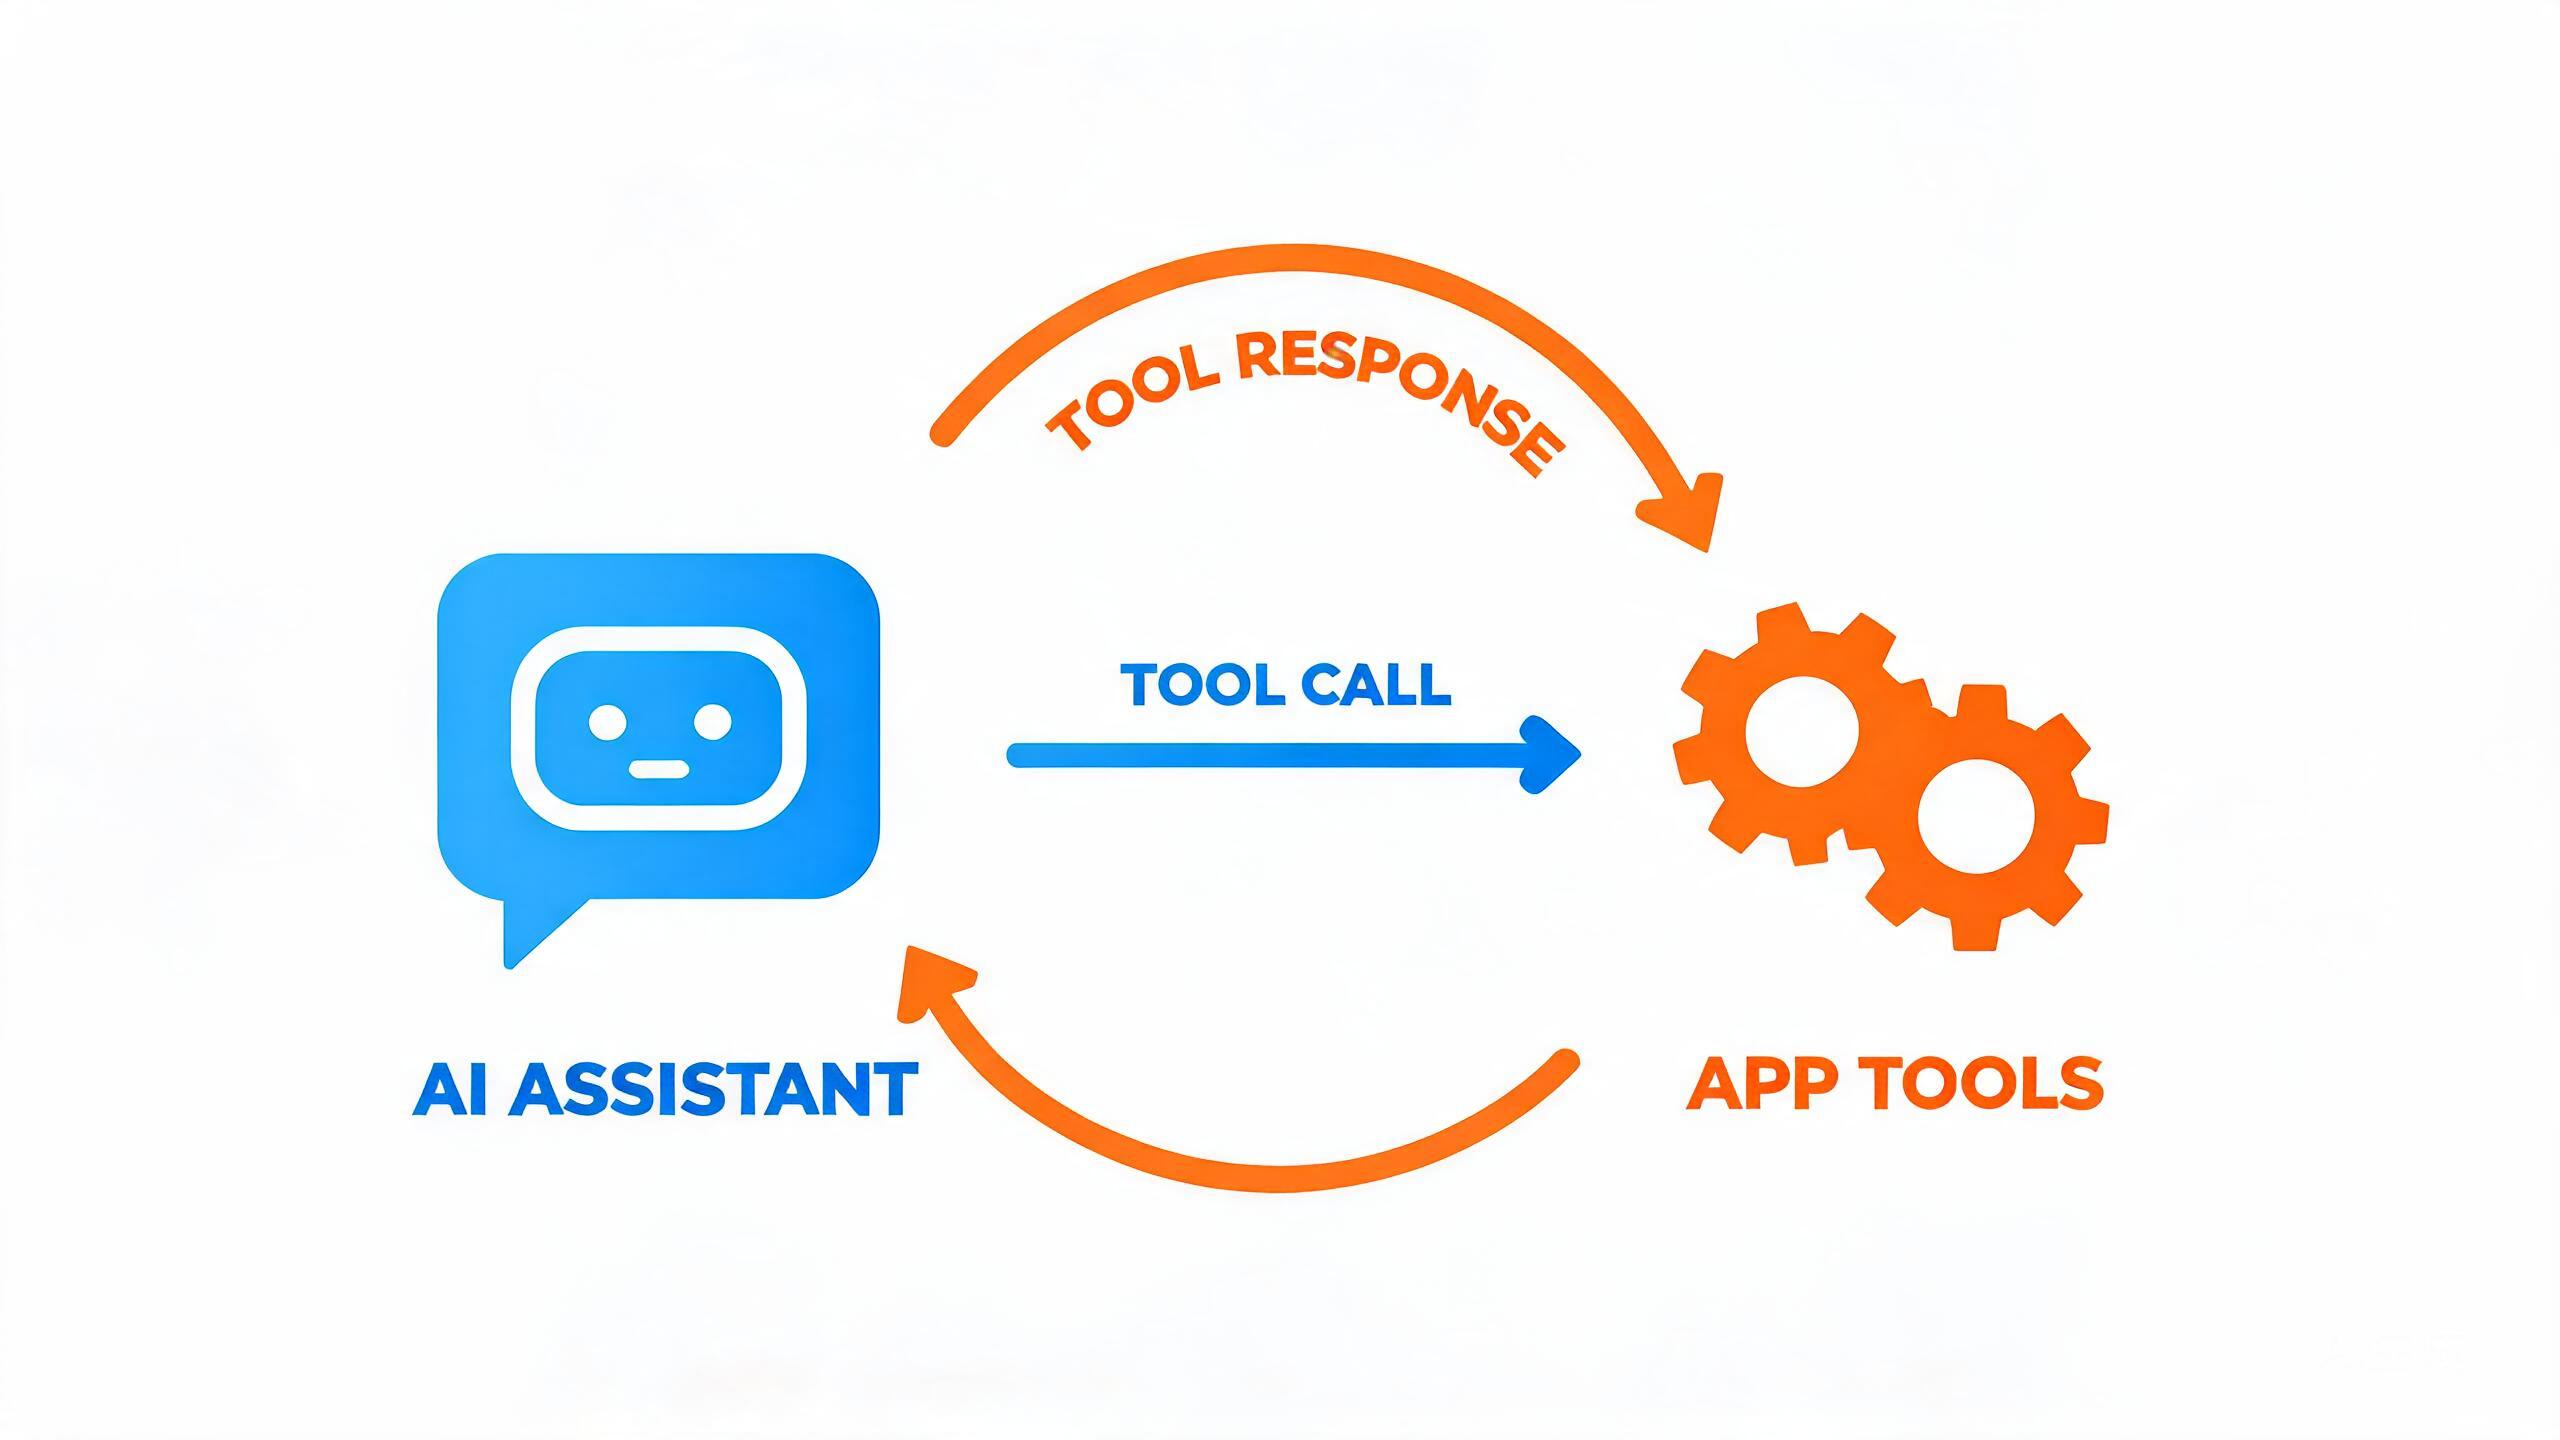
普通对话 :模型只能生成文本,建议用户”自己去做某事”;RAG :模型能基于检索资料回答,但依然只输出文本;Function Calling :模型可以输出一个结构化的”我要调用某工具 + 参数”,由我们的代码执行后把结果喂回去,它再基于真实结果继续对话。
一个直观的对比:用户问”北京今天适合跑步吗”——普通模式下模型会说”建议查看天气预报”(或者干脆编一个天气);Function Calling 模式下,模型会返回”请调用 getWeather 工具,参数 city=北京”,我们执行真实的天气查询,把结果交回模型,它基于真实数据 回答”今天 18-26 度,多云,湿度适中,很适合跑步”。同一个模型,接入工具前后,能力是物种级的差异。
这里要先破除一个常见误解:模型并不”执行”任何函数 。它只是通过训练学会了在合适的时机输出一段结构化 JSON,表达”我想调用 XX 函数,参数是 XX”。真正按下执行按钮的,永远是我们的代码。这个设计保证了安全性——模型永远只是”建议者”。
2. Function Calling 的工作原理
一次完整的工具调用,时序是这样的:
1
2
3
4
5
6
7
8
9
10
11
12
13
用户 前端/后端应用 LLM │ │ │ │── 提问 ──────────────▶│ │ │ │── messages + tools ──▶│ │ │ │ (模型决定需要调用工具) │ │◀─ tool_calls(JSON) ───│ │ │ │ │ │ 校验参数 → 执行本地函数 │ │ │ 计算结果 │ │ │ │ │ │── tool 结果回填 ──────▶│ │ │ │ (模型基于结果组织自然语言) │◀── 最终回答 ──────────│◀─ 最终 content ───────│
几个关键点:
请求时除了 messages,还要带上 tools 数组——每个工具的名字、描述、参数 JSON Schema;
模型返回的 finish_reason 是 tool_calls 而不是 stop,message.tool_calls 里带着函数名和参数字符串;
我们执行完后,把结果作为 role: 'tool' 的消息追加 到 messages 末尾,再次请求;
模型可能连续调用多个工具(比如先查天气再查空气),所以要写一个循环 而不是单次 if。
3. 实战:一个能查天气、画图表、换主题的智能助手 我们来做一个跑在前端页面里的助手,它有三个工具:查天气(模拟 API)、画图表(渲染 ECharts)、切换页面主题。麻雀虽小,五脏俱全。
Schema 的质量直接决定模型调用得准不准。description 不是装饰,是模型的”工具说明书”,要写清楚什么时候该用这个工具、参数什么含义:
1
2
3
4
5
6
7
8
9
10
11
12
13
14
15
16
17
18
19
20
21
22
23
24
25
26
27
28
29
30
31
32
33
34
35
36
37
38
39
40
41
42
43
44
45
46
47
48
const tools = [ { type: 'function' , function : name: 'getWeather' , description: '查询指定城市的实时天气。当用户询问天气、温度、是否适合外出时调用。' , parameters: { type: 'object' , properties: { city: { type : 'string' , description : '城市名称,如:北京' }, unit: { type : 'string' , enum : ['celsius' , 'fahrenheit' ], description : '温度单位,默认 celsius' }, }, required: ['city' ], }, }, }, { type: 'function' , function : name: 'renderChart' , description: '在页面上渲染一张柱状图或折线图。当用户要求可视化数据、画图、看趋势时调用。' , parameters: { type: 'object' , properties: { title: { type : 'string' , description : '图表标题' }, type: { type : 'string' , enum : ['bar' , 'line' ], description : '图表类型' }, labels: { type : 'array' , items : { type : 'string' }, description : 'X 轴标签数组' }, values: { type : 'array' , items : { type : 'number' }, description : '与 labels 对应的数值数组' }, }, required: ['title' , 'type' , 'labels' , 'values' ], }, }, }, { type: 'function' , function : name: 'setTheme' , description: '切换页面主题。当用户要求换成深色/浅色模式时调用。' , parameters: { type: 'object' , properties: { mode: { type : 'string' , enum : ['light' , 'dark' ], description : '目标主题' }, }, required: ['mode' ], }, }, }, ];
3.2 工具执行器与处理循环 先在本地实现真正的执行逻辑,注意每个函数返回结构化数据 而不是漂亮话——这部分是给模型看的,不是给用户看的:
1
2
3
4
5
6
7
8
9
10
11
12
13
14
15
16
17
18
19
20
21
22
23
24
25
26
27
28
const toolExecutor = { async getWeather ({ city, unit = 'celsius' } ) const mockData = { city : '北京' , temp : 22 , unit, condition : '多云' , humidity : 45 , aqi : 58 }; return mockData; }, async renderChart ({ title, type, labels, values } ) const dom = document .getElementById('chart' ); const chart = echarts.getInstanceByDom(dom) || echarts.init(dom); chart.setOption( { title: { text : title }, xAxis: { type : 'category' , data : labels }, yAxis: { type : 'value' }, series: [{ type, data : values }], }, true ); return { success : true , message : `图表《${title} 》已渲染到页面` }; }, async setTheme ({ mode } ) document .documentElement.dataset.theme = mode; return { success : true , message : `已切换到${mode === 'dark' ? '深色' : '浅色' } 模式` }; }, };
然后是核心的处理循环,逻辑不复杂,但每一步都有讲究:
1
2
3
4
5
6
7
8
9
10
11
12
13
14
15
16
17
18
19
20
21
22
23
24
25
26
27
28
29
30
31
32
33
34
35
36
37
38
39
40
41
42
43
44
const messages = [];async function chat (userInput ) messages.push({ role : 'user' , content : userInput }); for (let round = 0 ; round < 5 ; round++) { const res = await client.chat.completions.create({ model: 'gpt-4o-mini' , messages, tools, }); const msg = res.choices[0 ].message; messages.push(msg); if (!msg.tool_calls?.length) { return msg.content; } for (const call of msg.tool_calls) { const fnName = call.function.name; let result; try { const args = JSON .parse(call.function.arguments); console .log(`[tool] ${fnName} (${JSON .stringify(args)} )` ); result = await toolExecutor[fnName]?.(args) ?? { error : `未知工具: ${fnName} ` }; } catch (e) { result = { error : e.message }; } messages.push({ role: 'tool' , tool_call_id: call.id, content: JSON .stringify(result), }); } } return '任务过于复杂,已中断。' ; }
实战里三个细节最容易被坑:
function.arguments 是 JSON 字符串JSON.parse,而且偶尔模型会生成不合法 JSON(尤其小模型),parse 一定要包 try-catch;tool_call_id 必须严格对应循环上限 。不加轮数上限的话,模型可能陷入”调用 - 结果 - 再调用”的死循环,token 哗哗烧。
如果你和我一样在用流式接口(stream: true),还有第四个坑:tool_calls 是分片到达的 。增量 chunk 里的 delta.tool_calls 只有函数名的碎片和 arguments 的零散字符,必须自己按 index 拼接完整后才能执行:
1 2 3 4 5 6 7 8 9 10 11 const toolBuffers = {};for await (const chunk of stream) { const delta = chunk.choices[0 ]?.delta; if (!delta?.tool_calls) continue ; for (const tc of delta.tool_calls) { toolBuffers[tc.index] ??= { name : '' , args : '' }; if (tc.function?.name) toolBuffers[tc.index].name += tc.function.name; if (tc.function?.arguments) toolBuffers[tc.index].args += tc.function.arguments; } }
所以我的建议是:可能触发工具调用的请求直接关掉 stream(这个阶段用户本来就在看”正在执行…”步骤条),只在最终回答阶段开流式——拼接逻辑省了,打字机效果也不受影响。
3.3 让 AI 操控 UI:路由跳转与表单填充 工具的想象空间远不止”查数据”。把前端 Router、表单 API 封装成工具,AI 就能真正”操作”你的应用:
1 2 3 4 5 6 7 8 9 10 11 12 13 14 15 16 17 18 19 20 21 22 23 24 25 26 27 28 29 30 31 32 33 { type: 'function' , function : name: 'navigate' , description: '页面内路由跳转。当用户说"打开设置页""带我去文章列表"时调用。' , parameters: { type: 'object' , properties: { path: { type : 'string' , description : '站内路径,如 /settings、/posts' }, }, required: ['path' ], }, }, }, { type: 'function' , function : name: 'fillForm' , description: '填充指定表单字段。当用户提供信息并要求帮忙填写时调用。' , parameters: { type: 'object' , properties: { fields: { type: 'object' , description: '字段名到值的映射,如 { "title": "xxx", "tags": ["ai"] }' , additionalProperties: true , }, }, required: ['fields' ], }, }, },
对应的执行器就是几行我们写了几年的老代码:
1 2 3 4 5 6 7 8 9 10 11 async navigate ({ path } ) const allowed = ['/posts' , '/settings' , '/about' ]; if (!allowed.includes(path)) return { error : `不允许跳转到 ${path} ` }; router.push(path); return { success : true , message : `已跳转到 ${path} ` }; }, async fillForm ({ fields } ) formStore.patch(fields); return { success : true , message : `已填充 ${Object .keys(fields).length} 个字段` }; },
这种”对话即操作”的体验一旦做出来就回不去了:新用户不再需要摸索导航菜单,直接说人话就行。
4. 安全边界与参数校验 模型输出的参数是”尽力而为”的——它会理解错、会拼错、偶尔会”越权”。任何工具执行前必须校验参数 ,这是红线。我现在的标配是 zod:
1
2
3
4
5
6
7
8
9
10
11
12
13
14
15
16
17
18
19
20
21
22
23
24
25
26
27
28
29
30
31
import { z } from 'zod' ;const schemas = { navigate: z.object({ path: z.string().refine((p ) => p.startsWith('/' ) && !p.includes('..' ), { message: '仅允许站内路径' , }), }), setTheme: z.object({ mode: z.enum(['light' , 'dark' ]), }), renderChart: z.object({ title: z.string().max(50 ), type: z.enum(['bar' , 'line' ]), labels: z.array(z.string()).max(100 ), values: z.array(z.number().finite()).max(100 ), }), fillForm: z.object({ fields: z.record(z.unknown()), }), }; function validateArgs (fnName, args ) const schema = schemas[fnName]; if (!schema) return { ok : false , error : '未注册的工具' }; const parsed = schema.safeParse(args); if (!parsed.success) { return { ok : false , error : parsed.error.issues.map((i ) => i.message).join('; ' ) }; } return { ok : true , data : parsed.data }; }
除了参数校验,几条安全原则请刻进 DNA:
最小权限 :AI 能调用的工具集合单独维护白名单,绝不能把 eval、任意 HTTP 请求、文件读写这类能力暴露给它;写操作加确认 :跳转、填表单这类可撤销操作可以自动执行,但删除、支付、发送这类动作,务必在 UI 上弹确认框(下篇会展开这个设计);把错误还给模型 :校验失败不要静默失败,把错误信息作为 tool 结果回填,模型通常会自己修正参数重试。
5. Function Calling 与 Agent:一步之遥 回头看我们的实现:模型提议 → 代码校验执行 → 结果回填 → 模型再决策。如果把”循环”做得更健壮——支持多步规划、任务拆解、失败重试、记忆管理——它就成了 Agent 的雏形。
Function Calling 是”单次工具调用”,Agent 是”自主的多步任务循环”:给模型一个目标,它自己决定调用哪个工具、调多少次、何时结束。我们的 chat() 函数其实已经是个最简单的 Agent 循环了,只是上限 5 轮、没有规划能力。从”工具箱”到”员工”,中间隔的是上下文管理、错误恢复和权限设计这几块硬骨头。
这就是下一篇的主题:当 AI Agent 时代到来,前端 UI 该怎么设计才能承接”长任务、不确定、可干预”的新交互形态。流式界面、步骤可视化、Generative UI,我们下篇见。
写在最后 Function Calling 是我 2024 年做 AI 应用感触最深的一个机制:它把模型的”语言智能”和应用的”真实能力”用一个极简的协议缝合在一起,而且把执行权、否决权牢牢留在开发者手里。这个设计的优雅之处在于——模型再强,也只是一个提建议的顾问;拍板和动手的,始终是我们的代码。
给想做尝试的同学一个起步建议:从你自己应用里挑 2~3 个高频操作(搜索、跳转、主题切换)封装成工具,一两天就能搭出可用的 Demo。当你第一次看到用户对着输入框说”帮我把这周的访问量画成图”,然后图表真的出现在页面上——那一刻的成就感,比调通十个组件都强。